
Introduction
Here’s the secret the design industry doesn’t advertise: luxury isn’t a price tag — it’s a set of decisions. Walk through any expensive-looking home and you’ll find the same handful of moves repeated: warm layered lighting, generous textiles, a restrained palette, real materials in small doses, and ruthless editing. None of those require a five-figure budget. They require knowing where money matters and where it doesn’t.
This guide is built on that exact principle — spend where the eye goes, save where it doesn’t. Every idea below comes with real costs, a clear save-vs.-splurge breakdown, and the kind of practical detail (drying times, measurements, what to avoid) that actually helps you get it done. No vague “add some elegance” advice. Just twelve budget luxury home decor ideas that genuinely work.
The Budget-Luxury Rulebook: Spend vs. Save
Before the ideas, the framework designers use on every budget project:
- Spend on what you touch and what glows. Hardware, faucets, textiles, and lighting are handled and seen up close every day — cheap versions betray themselves instantly. These are your splurge zones.
- Save on what the eye reads at a distance. Wall paint, curtain panels, large art prints, and decorative objects are judged from across the room. Good styling beats expensive materials here.
- One real thing per room. A single genuine element — a brass lamp, a wool rug, a marble tray — makes everything around it look more expensive. It’s the “halo effect,” and it’s the cheapest luxury trick there is.
- Editing is free. Removing half the objects from a shelf costs nothing and instantly makes the remaining pieces look curated and valuable. Luxury is as much about what’s absent as what’s present.
Keep this rulebook open — every idea below follows it.
1. Limewash the Walls: Old-World Walls for $50
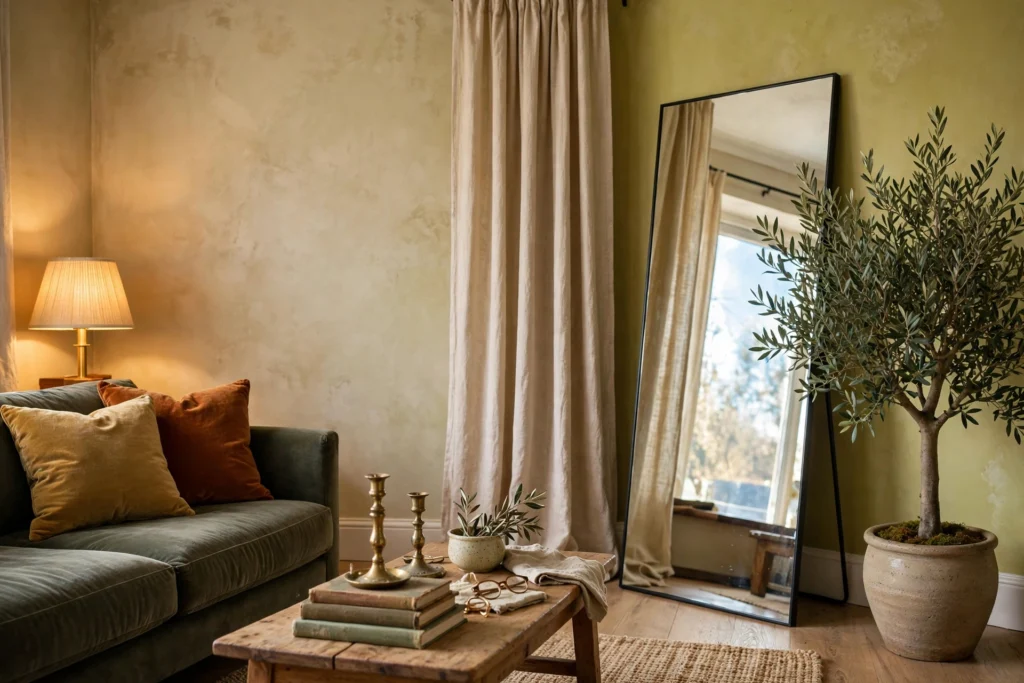
Limewash paint is the single best dollar-for-dollar luxury upgrade in existence. Its cloudy, movement-filled finish gives flat drywall the depth of old European plaster — and it costs about the same as regular paint. One accent wall in a warm off-white or soft clay tone changes the entire register of a room from “rental” to “restored.”
It’s also forgiving: the mottled application hides imperfect walls better than flat paint, and touching up is invisible since there’s no uniform finish to match.
How to do it: Budget $30–$60 per gallon; a 12 × 12 ft room needs 2 gallons for two coats (about $60–$120 total). Apply with a large block brush in random crisscross strokes — the technique is intentionally imperfect. Drying time is 4–6 hours between coats. Save further by limewashing just one focal wall and using matching flat paint elsewhere. This is the highest-impact idea on this list — start here.
2. Swap the Hardware: $5 Pulls, $500 Feel
Nothing dates a kitchen, bathroom, or dresser faster than builder-grade chrome bar pulls — and nothing upgrades it faster than swapping them for brass. It’s a 30-minute job with a screwdriver, and the transformation is wildly disproportionate to the cost. Unlacquered brass develops a living patina; matte black reads modern and architectural.
Measure twice: hardware comes in standard center-to-center sizes (most commonly 96 mm / 3¾ in and 128 mm / 5 in). Buy one pull first and test-fit before ordering twenty.
Save vs. splurge: Budget brass-effect pulls cost $3–$8 each; solid brass runs $12–$30 each. A kitchen with 20 pulls costs $60–$160 on a budget, $240–$600 in solid brass. The honest middle path: solid brass on the most-touched pieces (entryway, kitchen island), budget pulls inside closets and laundry. Nobody will ever know.
3. Hang Curtains High and Wide: The $80 Tailored Look
Custom drapery costs thousands; the designer look costs under a hundred. The trick is entirely in the hanging: mount the rod 10–15 cm below the ceiling (not at the window frame) and extend it 20–30 cm beyond the window on each side. Floor-length panels in a simple linen-look fabric then make windows look twice as large and ceilings feel taller.
Buy panels 5–8 cm longer than the floor measurement and let them “kiss” the floor or puddle very slightly — hovering curtains scream budget. If panels are too long, a $15–$25 hemming job at a local tailor beats buying new.
How to do it: Budget $40–$80 per window using ready-made 95–108 inch panels (IKEA, Target, and Amazon all carry convincing linen blends at $20–$40 per pair). A $20–$30 metal rod with simple finials completes it. Total per window: $60–$110. Avoid grommet tops (they read casual); back-tab or pinch-pleat styles read custom.
4. Thrift the Brass: Vintage Finds, Designer Prices
Brass candlesticks, trays, bowls, and figurines at thrift stores and flea markets cost $2–$15 and look identical to the $80–$200 versions in decor boutiques — because half the boutique versions are imitating vintage anyway. Real aged brass has a patina no factory can fake convincingly.
What to hunt: candlesticks (always), small trays, lidded boxes, bookends, and picture frames. What to skip: anything lacquered shiny-gold (that’s 1980s, not vintage) and anything you can’t test for weight — real brass is heavy.
Designer tip: The styling rule is odd numbers and varying heights — three candlesticks of different heights on a stack of books beats a matching pair every time. Clean finds with a 50/50 vinegar-water soak, then decide: polished for glamour, or leave the patina for warmth. Total budget for a styled shelf: $15–$40.
5. One Oversized Mirror: Double the Room for $100
A large mirror is the cheapest way to make a room feel twice as big and twice as bright — it literally doubles your light. Lean an oversized floor mirror (170 cm+) against the wall opposite a window and the whole room changes. No wiring, no tools, one purchase.
The budget sweet spot: big-box stores sell convincing 170 × 60 cm leaning mirrors for $80–$150. Check the frame finish in person — thin black or faux-brass frames look far more expensive than chunky ornate ones at this price.
How to do it: Budget $80–$200 total. Anchor the top to the wall with an anti-tip strap ($8) — non-negotiable with kids or pets. Position it to reflect a window, a lamp, or greenery — never clutter. One great mirror outperforms three small ones; buy the biggest your wall and wallet allow.
6. Layer the Lighting: Three Sources, Zero Renovation
Overhead-only lighting is what makes budget rooms feel flat. Designers use three layers — ambient (general), task (reading/working), and accent (glow) — and you can build all three with plug-in pieces. A $40 floor lamp with a warm bulb beside the sofa plus a $25 table lamp on the console transforms an evening room completely.
The bulb matters more than the fixture: 2700K warm white flatters skin, wood, and brass; anything cooler reads office-like. Frosted or fabric shades diffuse the light; bare bulbs create harsh shadows.
Save vs. splurge: Total budget $75–$200 for two lamps plus quality warm bulbs. Splurge candidate: one genuinely beautiful lamp (a brass pharmacy floor lamp, $120–$250) as the room’s jewelry; save on the second lamp. Put both on warm dimmable bulbs ($8–$12 each) and the room will photograph like a magazine.
7. Style With Books and Trays: The $30 Vignette
Open any designer portfolio and you’ll see the same formula on coffee tables and consoles: a stack of 2–3 large books + a tray or bowl on top + one small object (candle, bud vase, brass figurine). It’s called a vignette, it takes five minutes, and it makes any surface look styled rather than stored-on.
Coffee-table books don’t need to be new — thrift stores sell them for $2–$5. Remove dust jackets for cleaner spines. The tray corrals everything into one intentional composition; without it, the same objects look like clutter.
How to do it: Budget $20–$40 total (thrifted books $6–$15, a simple tray $10–$20, a candle $5). The rule of three: vary heights (tall books, medium tray, small object) and stick to one color family. This is pure styling — zero renovation, maximum effect.
8. Removable Wallpaper: The Reversible Statement Wall
One wall of bold wallpaper — botanical, grasscloth-look, or Art Deco pattern — gives a room the confidence of a designer project, and the peel-and-stick versions come off cleanly when you move or change your mind. It’s the commitment-free version of a $2,000 wall treatment.
Order samples first ($2–$5 each) and live with them on the wall for three days — colors shift dramatically between morning and evening light. Measure the wall and add 15% for pattern matching waste.
How to do it: Quality peel-and-stick runs $30–$60 per roll (covering ~28 sq ft); a 10 ft accent wall needs 3–4 rolls, so $90–$240 total. Hang from the top down with a plastic smoother, and keep a sharp utility knife for trimming. Avoid the cheapest rolls — thin wallpaper shows every wall imperfection underneath.
9. Go Big With Greenery: The $25 Sculpture
Nothing makes a room feel alive and expensive like a large plant — it’s a living sculpture that fills empty corners better than any furniture. An olive tree, fiddle-leaf fig, or bird of paradise in a simple ceramic pot reads designer instantly. Faux has finally gotten good: a quality faux olive tree ($60–$120) fools everyone from three feet away and never dies.
Real plant people: buy the largest plant you can afford, not three small ones. One 5-foot tree outperforms a crowd of 6-inch pots — small plants scattered around read cluttered; one statement plant reads intentional.
Designer tip: Budget $25–$60 for a real statement plant, $60–$120 for convincing faux. The pot matters as much as the plant: a $15–$30 simple ceramic or terracotta pot elevates a $25 plant to showroom status. Skip the plastic nursery pot — it’s the fastest way to ruin the effect.
10. Large-Scale Art, Thrift Frames: Gallery Walls for $50
Big art makes rooms feel expensive; big art is also expensive — unless you print it yourself. Public-domain museums (the Met, Rijksmuseum) offer free high-resolution downloads of classical paintings and vintage botanical prints. Print one at 24 × 36 inches at a local print shop ($15–$30) and frame it in a thrifted or IKEA frame ($10–$25).
The size is the luxury: one 24 × 36 piece over a sofa has ten times the impact of four 8 × 10s. Keep frames consistent (all black, all wood, or all brass) for a curated gallery feel.
How to do it: Total per large piece: $25–$55. For a gallery wall, plan the layout on the floor first and keep 5–8 cm gaps consistent. Vintage oil-painting style prints in gold thrift frames are the ultimate budget-luxury move — they look inherited, not purchased.
11. Velvet Pillow Covers: The $40 Sofa Upgrade
A tired sofa becomes a designer sofa with new pillow covers — not new pillows, just covers. Velvet, in particular, reads unmistakably luxurious: it catches light, adds depth, and feels expensive to the touch. Swap the covers seasonally and the whole room refreshes for the price of dinner.
The formula: odd numbers (3 or 5 on a standard sofa), two sizes (50 × 50 cm and 40 × 60 cm), one texture (velvet) + one pattern + one solid. Insert quality matters — plump feather-blend inserts ($12–$18 each) make $8 covers look like $80 pillows.
Save vs. splurge: Budget velvet covers run $8–$15 each; a full sofa refresh (5 covers + 2 new inserts) costs $50–$100. This is the fastest room transformation on the list — under an hour, including fluffing.
12. Edit Ruthlessly: The Free Luxury
The most luxurious rooms share one trait: restraint. Walk through your home with a box and remove 30–40% of the decorative objects — the half-empty candle, the souvenir you don’t love, the third throw pillow. What’s left suddenly looks curated, intentional, and valuable. Clutter is the enemy of luxury at every budget.
Then give everything that remains room to breathe: 15–20 cm of empty space around objects on shelves, one clear surface per room. Designers call it “negative space,” and it’s the difference between a styled home and a storage unit.
How to do it: $0. The only cost is decisiveness. Box the removed items for a week — if you don’t miss anything, donate the box. Repeat every season. This single habit does more for the luxury feel of your home than any purchase on this list.
Frequently Asked Questions
Can a home look luxurious on a small budget?
Absolutely — luxury is created by decisions, not dollars. The rooms that read expensive share the same traits: warm layered lighting, a restrained color palette, generous textiles, one or two genuine materials, and ruthless editing. Every one of those is achievable under $500 per room, and several (editing, styling, hanging curtains properly) cost nothing at all. The biggest budget mistake is spreading money thinly across everything instead of concentrating it on high-impact moves.
Where should I spend vs. save in home decor?
Spend on what you touch daily and what produces light: hardware, faucets, textiles, and lighting fixtures — cheap versions reveal themselves up close. Save on what the eye reads from a distance: wall paint, curtain panels, large art prints, and decorative objects, where good styling beats expensive materials. And always include one genuine element per room (real brass, wool, marble) — it creates a halo effect that elevates everything around it.
What is the cheapest way to make a room look expensive?
Three free-or-nearly-free moves: (1) declutter ruthlessly — remove a third of your decorative objects; (2) fix your lighting — switch to 2700K warm bulbs and add a second lamp source; (3) hang what you have properly — curtains high and wide, art at eye level (center ~150 cm from the floor). Together these cost under $50 and transform a room more than any single purchase.
How do I make a rental look luxurious without permanent changes?
Focus on the reversible big-hitters: limewash-style paint is renter-friendly only with permission, so instead use peel-and-stick wallpaper for an accent wall, swap hardware and store the originals (reinstall when you leave), lean an oversized mirror (no holes), layer plug-in lamps, and upgrade textiles. Every idea in this guide except drilling is rental-safe — that’s the point of budget luxury.
Which colors make a home look expensive on a budget?
Warm, complex neutrals: warm whites, greige, soft clay, mushroom, and deep olive or charcoal as accents. These shades mimic the palettes of high-end interiors and — crucially — they make inexpensive materials look richer. Avoid stark white (reads clinical and cheap) and avoid more than three main colors per room. Paint is the cheapest color transformation: $60–$120 per room.
Explore more
- Luxury Living Room Ideas — statement pieces and layouts for the main gathering space
- Bedroom Decor Ideas — layered, hotel-calm bedroom styling
- Warm Modern Bedroom Ideas — warm minimalism with real material palettes
[…] skip, and what changes when you move up. If you want the general principles first, start with our 12 luxury home decor ideas on a budget — this article is the spending plan that puts those principles into a […]